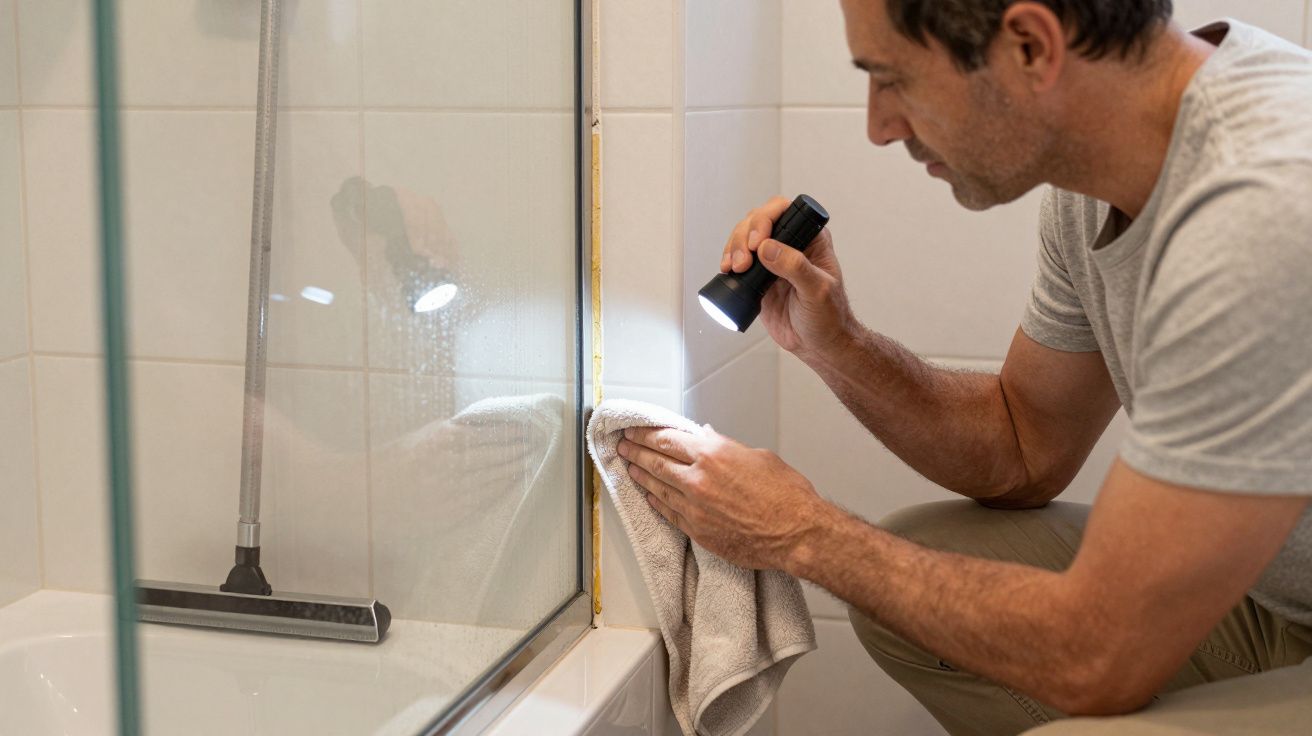
You spot it in the corner of your eye while you’re rinsing shampoo out: a faint dark line near the tray, a bead of water that seems to “return” even after you wipe it. In shower installations, that tiny failure point is often where hidden leaks begin - not with a dramatic burst pipe, but with a slow, confident seep that has time on its side. And time is exactly what turns a minor bathroom annoyance into rotten joists, loose tiles, and a ceiling stain that appears downstairs like a nasty surprise.
Most of us treat bathrooms like they’re built to shrug off water. They aren’t. They’re built to manage water, and that management depends on a few humble details staying intact.
The “small” line that keeps the room honest
Bathrooms fail quietly because they’re meant to be wet. A drip at the sink is obvious; a shower is supposed to splash. That’s why the earliest warning signs are so easy to dismiss: a musty smell that comes and goes, grout that looks permanently damp, silicone that’s gone slightly yellow at the edge.
The trouble is that water doesn’t need a gap you can see. It needs a path it can repeat. Once it finds one, it’ll take it every day, twice a day, for years.
Where leaks actually start (it’s rarely the pipe)
When people hear “leak”, they picture plumbing. In showers, the more common culprit is the interface - the joins between materials that move differently: acrylic tray to tiled wall, glass screen to tile, tile to grout line, grout to floor.
A shower can be perfectly plumbed and still leak if the water is getting behind the waterproof layer. That’s the key distinction: the surface can look fine while the structure is getting soaked.
The usual suspects in a modern shower
- Failed silicone at the tray edge: it shrinks, lifts, or cracks, especially where the tray flexes.
- Loose or poorly sealed shower screen channels: water runs down the frame and escapes at the base.
- Hairline grout cracks: not a waterfall, just enough to let spray migrate.
- Tile adhesive/grout used as “waterproofing”: they aren’t. They’re water-resistant at best.
- Blocked or slow waste: water pools longer, increasing the chance it finds a weak point.
If you take only one idea from this: showers are systems. A tiny break in one part can let water bypass everything else.
The slow physics of damage: repeat exposure beats drama
Hidden leaks don’t win by volume. They win by repetition. A tablespoon behind the tiles each shower doesn’t look like much-until it becomes a permanently damp cavity.
Once moisture lives where air doesn’t circulate, it stops behaving like “water on a surface” and starts behaving like a building problem: swelling timber, crumbling plasterboard, mould feeding on paper backing, metal fixings corroding. You can regrout three times and still not solve it if the water is already travelling behind.
There’s also a cruel delay built into the way houses show you the truth. The stain often appears far from the shower, because water follows joists, pipes, and gravity’s easiest route. By the time you see the mark downstairs, the leak has been practising for a while.
A quick self-check you can do in ten minutes
You don’t need to rip anything out to get useful information. You need to look like water looks: downward, sideways, and toward joins.
- Dry the tray-to-wall joint fully (towel, then a hairdryer on low if needed).
- Shower as normal, then don’t squeegee for once-let it behave naturally.
- Watch the corners and the screen base for returning beads or thin tracks.
- Press gently on the tray edge (if accessible). Any noticeable flex can break seals over time.
- Check the adjacent skirting/door frame for swelling, soft paint, or a persistent damp smell.
If the bathroom smells “earthy” even when it looks clean, treat that as evidence, not mood.
The fix that works (and the one that keeps failing)
Silicone is often blamed because it’s visible. But silicone is also often applied like a cosmetic, not a seal.
Resealing properly is boring - which is why it works
A durable reseal usually means:
- Removing all old silicone, including the thin film you can’t see.
- Cleaning and degreasing the joint (soap residue is a sealant killer).
- Letting the area dry fully.
- Applying sanitary-grade mould-resistant silicone, tooled into a continuous bead.
- Respecting cure time (yes, really) before using the shower.
The common failure is “silicone on top of silicone”. It looks neat for a month, then lifts because it never truly bonded.
When resealing isn’t enough
If water is getting behind tiles due to missing or failed tanking (waterproof membrane), surface fixes become a loop: regrout, re-silicone, repeat. In those cases, the correct repair is messier and more honest-partial strip-out and proper waterproofing.
A decent installer will talk about waterproofing like it’s the main event, not an optional extra. That’s a good sign.
When to stop DIY and call someone
Some issues are small and solvable; others are telling you the shower’s structure has been compromised. Get professional eyes on it if you notice:
- A ceiling mark below the bathroom, even if it “dries out”.
- Spongy floor feel near the shower or toilet.
- Tiles that sound hollow, move, or crack repeatedly.
- Persistent mould at the same joint despite cleaning and ventilation.
- A shower tray that visibly rocks or flexes.
At that point, the cost isn’t in the sealant. It’s in what the water has been doing when nobody was looking.
The quiet payoff of treating it early
The annoying thing about a “minor” shower issue is that fixing it feels optional right up until it doesn’t. You can live with a hairline gap. You can ignore a musty whiff. You can keep wiping the same corner and telling yourself it’s just splashback.
But bathrooms don’t reward optimism. They reward maintenance. Catch the leak at the join, and you’re buying back peace: dry timbers, stable tiles, and a downstairs ceiling that never has to join the conversation.
FAQ:
- Can a shower leak even if the pipes are fine? Yes. Many leaks come from failed seals, grout cracks, or poor waterproofing behind tiles rather than the plumbing itself.
- Is mouldy silicone always a sign of a leak? Not always; it can be a ventilation and cleaning issue. But recurring mould at the same joint can indicate moisture getting where it shouldn’t.
- Should I seal between the tray and tiles or leave a gap? In most cases you want a properly sealed, continuous joint with sanitary-grade silicone. A gap invites water behind the surface.
- How long should silicone cure before using the shower? Follow the product instructions, but commonly 24 hours. Using the shower too soon can compromise the bond.
- What’s the fastest clue of hidden leaks? Persistent musty odour, returning beads at corners after drying, or any damp staining in adjacent rooms-especially below the bathroom.


Comments (0)
No comments yet. Be the first to comment!
Leave a Comment