Bathroom seals sit in the narrow joints around baths, showers, basins and tiled edges, quietly keeping water on the right side of the room. When they fail, hidden water damage can start long before you see a stain, because moisture slips behind “perfect” tiles and stays there. That is why engineers and surveyors pay attention to the soft, boring lines of silicone as much as the shiny finishes.
The frustrating part is how ordinary the warning signs look. A tiny gap. A faint dark line. A bit of mildew you wipe away and forget. Behind it, water can be feeding a slow problem that spreads along plasterboard, skirting and subfloor, one shower at a time.
The leak that flatters the eye
Bathrooms are built to look sealed. Straight grout lines, glossy tile faces, clean corners-everything suggests water control, even when the weak point is a flexible bead no wider than your little finger.
Engineers see the pattern during inspections: the tiles are sound, the plumbing is fine, and yet there’s damp where there “shouldn’t” be any. The cause is often not dramatic pipe failure but repeated splash and seepage through tired or poorly applied seals.
The most expensive-looking bathrooms can hide the cheapest failure: a bead that never bonded properly.
Why bathroom seals fail in the first place
Sealant is asked to do two jobs at once. It must stick to different materials (tile, acrylic, enamel, stone) and remain flexible while the bath or shower tray moves under weight and heat.
Over time, a few common forces break that promise:
- Movement: baths flex when filled; shower trays shift slightly; walls expand and contract.
- Poor prep: silicone applied over dust, soap film or old sealant never truly bonds.
- Wrong product: decorators’ caulk where sanitary silicone is needed, or non-mould-resistant mixes.
- Bad geometry: too thin a bead, gaps too wide, or missing backing so the sealant stretches and tears.
- Cleaning chemistry: harsh bleach use can degrade some sealants and encourages patch repairs that trap moisture.
The result is usually a micro-gap, not an obvious hole. Water doesn’t need much space to travel; it only needs repetition.
How hidden water damage develops behind tiles
Water that gets past a seal doesn’t always pour down. Often it wicks. It clings to dust, plaster, timber and the paper face of plasterboard, spreading sideways as much as downwards.
Typical “routes” include the bath rim to wall junction, shower screen channels, and the base of tiled boxing around pipes. Once moisture sits there, it brings secondary problems:
- Swollen boards and softened adhesive, leading to loose tiles or hollow-sounding patches.
- Mould growth in voids, even if the visible surfaces look clean.
- Rot in timber studs or floor edges, especially around showers on suspended floors.
- Corrosion around fixings, including shower screen brackets and metal trim.
Hidden water damage is rarely one big event. It’s a thousand small wettings that never quite dry.
The quiet tells: what engineers notice on a visit
You can often spot the same clues without instruments, if you know where to look. The key is to check beyond the obvious mould line.
Visual signs (even in a “nice” bathroom)
- Sealant pulling away at one edge, especially at the ends of the bath.
- A crack that reappears soon after you “touch it up”.
- Persistent black spots that return in the same corner.
- Grout that looks darker near the tray edge compared with higher courses.
- Paint bubbling or soft plaster on the wall outside the shower area.
Feel and smell signs
- Skirting that feels slightly spongy near the bath end panel.
- A musty odour after the room has been shut for a day.
- Floor that feels subtly springy next to the shower, not across the whole room.
If you’re in a flat, pay attention to what happens below you too. A neighbour’s ceiling stain can be the first “visible” symptom of your invisible gap.
A simple inspection routine that takes ten minutes
You don’t need to rip tiles off to be sensible. You do need a repeatable check, done when the bathroom is dry and well-lit.
- Run a finger along the seal and look for sections that lift or crumble.
- Check the corners and end stops where bath panels meet walls-these are common failure points.
- Look at the seal profile: it should be smooth, continuous and slightly concave, not thin and stringy.
- Inspect after a shower: if water pools against the seal or sits in channels, it’s being given time to creep.
- Open the bath panel (if you can): look for damp marks, mould speckling, or a persistent “wet” smell.
If anything suggests ongoing moisture, don’t assume it’s “just condensation”. Condensation is usually broad and seasonal; seal failures are local and repeatable.
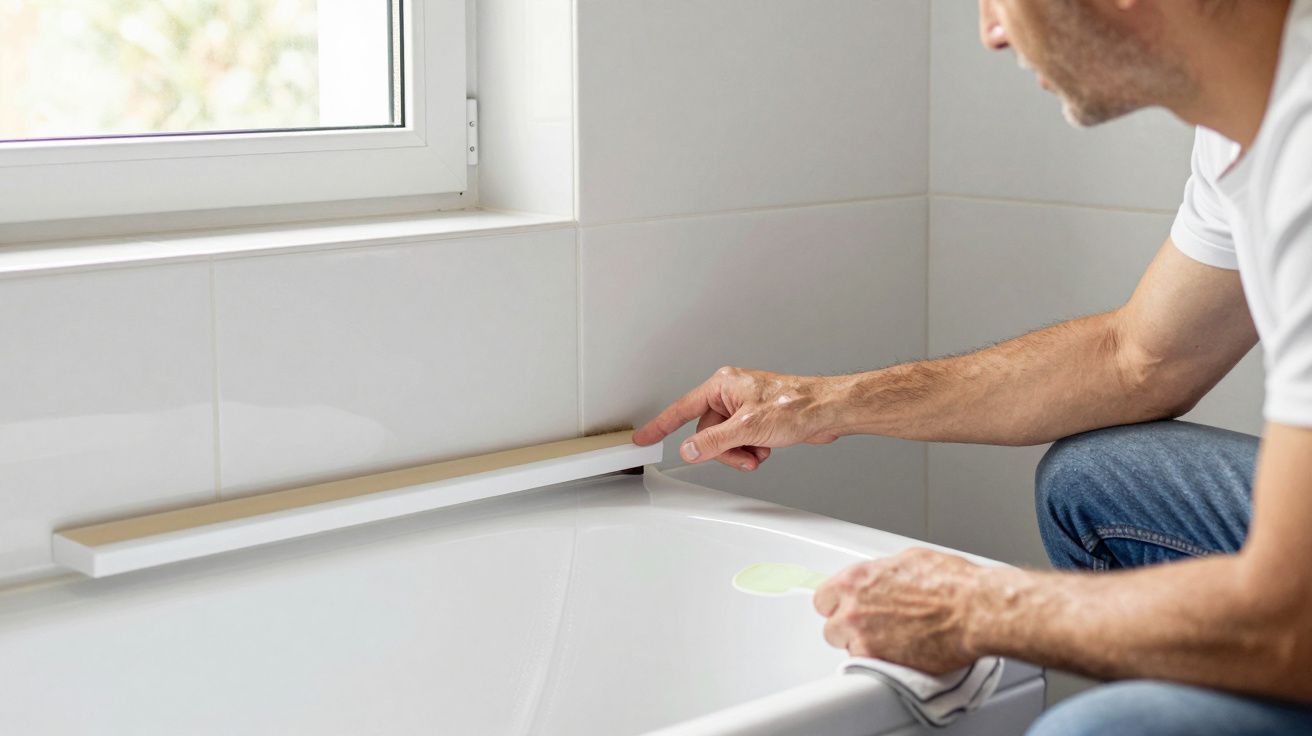
Resealing properly: the difference between a fix and a smear
Most seal failures get worse because people do the understandable thing: add more silicone on top. That can trap moisture and leave a perfect-looking bead that still leaks behind.
A proper reseal tends to follow a few non-negotiables:
- Remove all old sealant, including the thin residue that stops bonding.
- Dry the area thoroughly (and let it stay dry); use ventilation and time, not just a quick wipe.
- Clean and degrease with an appropriate cleaner so soap film isn’t acting as a release agent.
- Use sanitary, mould-resistant silicone suited to the surface (acrylic baths and some stones need care).
- Fill the bath before sealing if instructed-this accounts for flex so the bead isn’t immediately stressed.
- Tool the bead once, smoothly, so it contacts both surfaces without gaps or air pockets.
If the gap is wide or movement is heavy, backing rod and correct joint design matter more than brand names. The goal is adhesion and flexibility, not thickness for its own sake.
When it’s more than the seal
Sometimes the seal is the messenger rather than the culprit. If you see repeated failures in the same spot, consider the underlying conditions:
- The bath isn’t properly supported and flexes excessively.
- The shower tray is moving because the base isn’t bedded correctly.
- Water is escaping from a screen seal, door sweep, or wall penetration (like a mixer valve).
- The wall behind is already saturated, and mould keeps breaking through at the edge.
If tiles are loosening, grout is crumbling at the base, or the floor feels compromised, it can be time for a professional assessment. Early intervention is vastly cheaper than rebuilding a wet wall.
The unglamorous maintenance that protects the whole room
Bathroom seals are not an aesthetic extra; they’re a functional barrier that takes daily stress. Treat them like you would a smoke alarm battery: small, dull, and worth a routine check.
A quick habit helps more than heroic deep cleans:
- Squeegee or towel-dry the main splash zones after use.
- Keep ventilation effective so edges actually dry between wettings.
- Avoid “patching” with new silicone over old.
- Recheck seals every few months, especially in winter when drying is slower.
Perfect tiles sell the idea of permanence. In reality, the room depends on a flexible line that ages, moves, and occasionally needs doing again-before the leak has a chance to hide.


Comments (0)
No comments yet. Be the first to comment!
Leave a Comment