Bathroom seals look like the neat finishing touch around a bath, shower tray, or basin. But the same bead of silicone that keeps water on the right side of the tiles can also disguise hidden leaks, quietly feeding damp for months. If your bathroom smells “a bit musty” or the seal line keeps going black, it’s often not a cleaning problem at all.
I learnt this the boring way: a shower that looked spotless from the outside, yet the skirting board beside it softened, then lifted, then gave off that sweet-damp odour you can’t un-smell. The silicone still looked intact. That’s the trap-good-looking sealant can fail in ways you can’t see.
Why silicone hides failure so well
Silicone doesn’t just sit on top like paint. It bridges gaps, flexes with movement, and clings to glazed surfaces in a way that can create a convincing “all good” line even when the bond behind has let go. Water doesn’t need a gaping hole; it only needs a pin-thin path and time.
Bathrooms also create perfect conditions for slow damage. Daily heat, cooling, vibration from doors and footsteps, and constant moisture means even a competent seal can degrade. The mess stays out of sight until timber swells, grout crumbles, or the downstairs ceiling stains.
A seal can look continuous from the front while being detached along the back edge. Water finds the detour. Gravity does the rest.
The common failure modes (and what they look like)
Most seal failures fall into a few predictable patterns. Knowing them helps you decide whether you’re dealing with cosmetic mould or a plumbing-adjacent problem.
1) Adhesion loss: the seal lifts from one side
The bead still “exists”, but it no longer sticks to the bath or tile. You might notice a hairline shadow, a slightly raised edge, or a section that feels rubbery and hollow when you press it.
2) Split bead: a micro-crack at a corner
Corners and joints are stress points. If you see a fine split at the tray corner, around a mixer valve plate, or where tile meets trim, treat it like a leak until proven otherwise.
3) Wrong order: sealing before the bath is weighted
A bath flexes when filled and when someone stands in it. If silicone was applied when the bath was empty and unsupported, the first few uses can pull the bead away, even if it still looks tidy.
4) Sealing over movement, not fixing it
Loose shower screens, wobbling taps, and trays that aren’t properly bedded will keep moving. Silicone becomes the sacrificial hinge, and it loses.
Quick checks that catch hidden leaks early
You don’t need specialist kit for a first pass. You need light, tissue, and a bit of suspicion.
- Dry tissue test: Run a dry tissue along the bottom edge of the seal after a shower. If it picks up moisture from a spot you didn’t splash, that’s a clue.
- Press test: Gently press the bead at several points. A good seal feels firm and bonded; a failing one feels springy or lifts at the edge.
- Look for patterns: Mould that returns in the same section, discolouration behind clear silicone, or a persistent wet patch on grout directly below the bead is rarely random.
- Check the “outside” too: Swollen skirting, soft laminate, peeling paint on the other side of the wall, or a downstairs ceiling mark means the water has already left the bathroom.
If you can smell damp when the bathroom is dry, assume moisture is sitting where air can’t reach.
The uncomfortable truth: mould isn’t always the main issue
Black staining on silicone can be just surface mould from poor ventilation. But repeated staining in one segment often happens because water is getting behind the seal and feeding biofilm from the back. You scrub the front, it looks better for a week, then it blooms again.
In those cases, re-sealing without fixing the cause can feel like progress while the problem continues. The bead becomes a prettier lid on the same damp cavity.
When re-sealing is enough - and when it isn’t
Here’s a simple way to think about it: are you restoring a clean, stable joint, or trying to patch a moving or wet structure?
| Situation | Likely fix | What to do next |
|---|---|---|
| Old, mouldy bead but surfaces are solid and dry | Re-seal | Remove fully, clean, dry, re-apply |
| Bead lifts, but no damage yet | Re-seal + investigate | Find why it lifted (movement, poor prep) |
| Soft floor, swollen trim, stains beyond shower area | Not just sealant | Find leak path; may need plumbing/repairs |
If there’s any sign the substrate is wet-plasterboard softening, grout crumbling, timber swelling-treat silicone as the last step, not the first.
How to re-seal properly (so it actually lasts)
A good re-seal is mostly preparation. Rushing it is how you end up with a neat line that fails again.
Step-by-step, no heroics
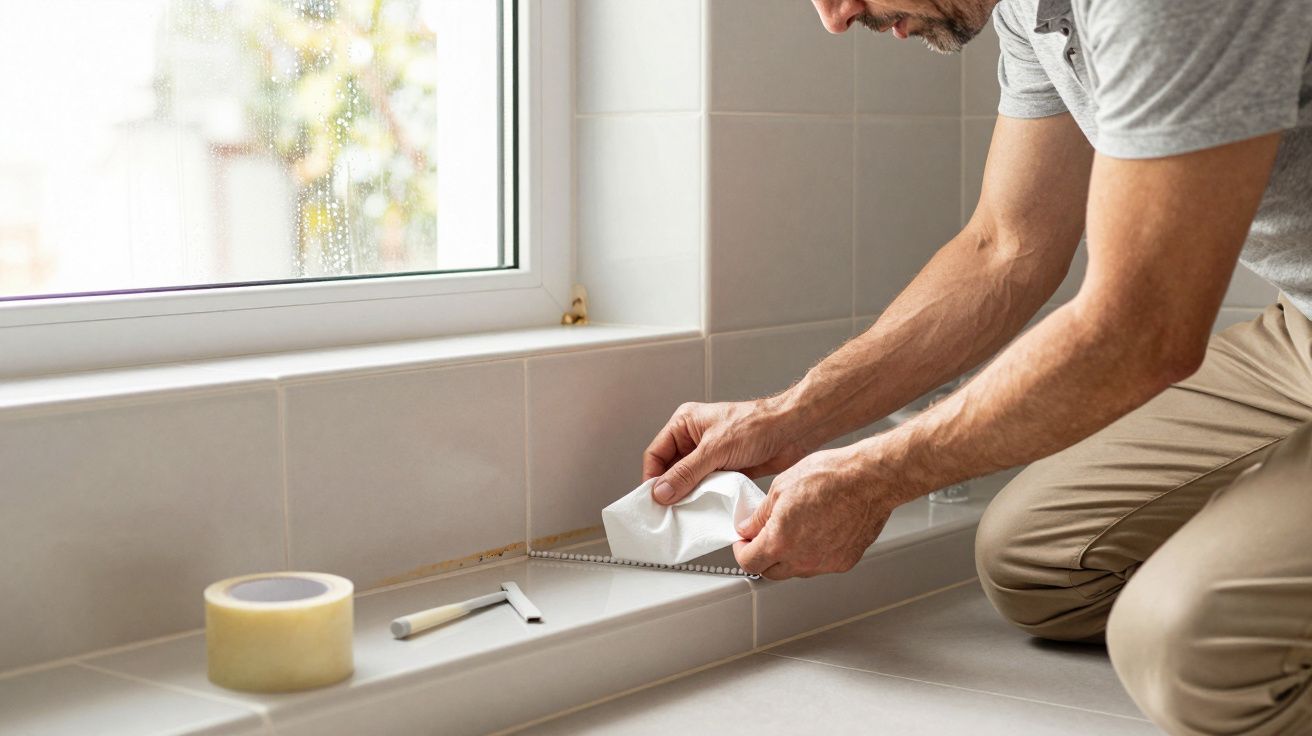
- Remove all old silicone. Use a silicone remover tool and, if needed, a dedicated remover gel. Any leftover film reduces adhesion.
- Clean the surfaces. Degrease with a bathroom-safe cleaner. Rinse well.
- Kill spores, then dry. A mould-killer helps, but dryness is the real win. Leave it to dry thoroughly-fans on, window open, or a dehumidifier.
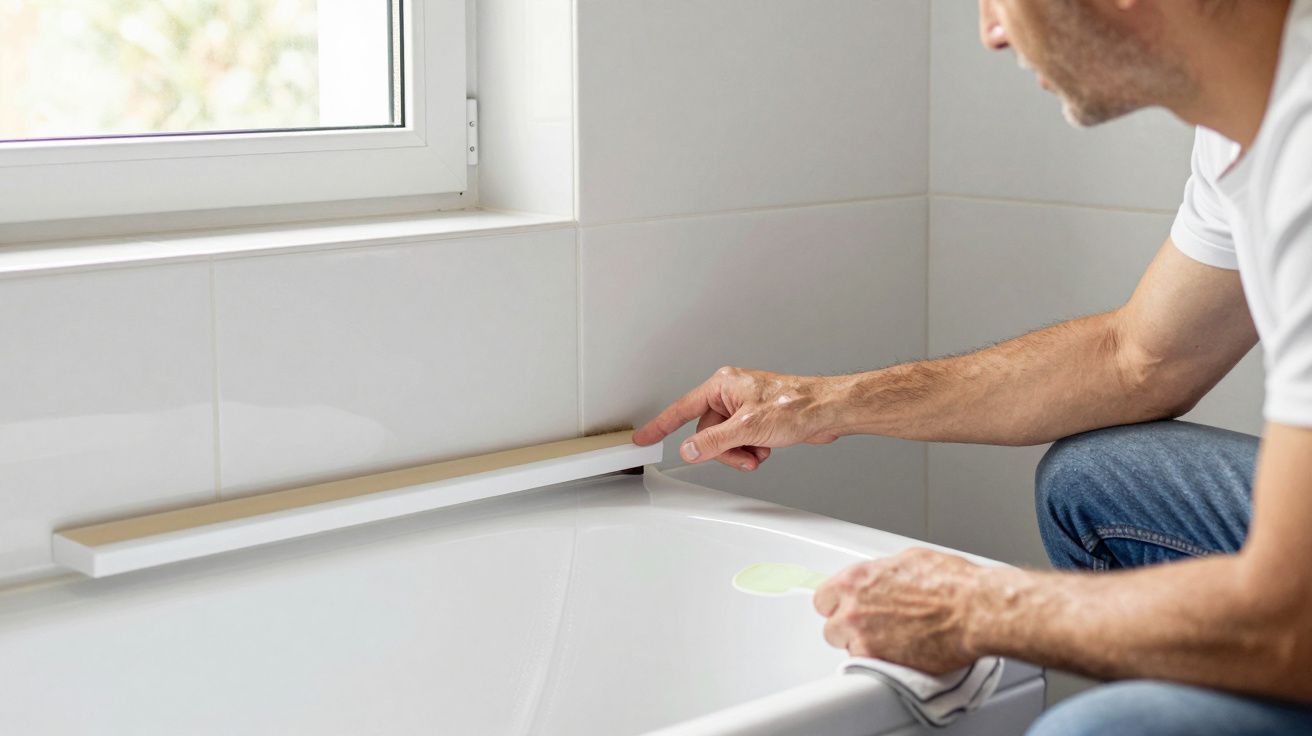
- Weight the bath (if sealing a bath). Fill it with water before sealing so it settles to its “in use” position.
- Tape the line. Two strips of masking tape create clean edges and stop over-smearing.
- Apply a continuous bead. One steady pass beats stop-start. Tool it once; over-working drags it thin.
- Cure properly. Follow the cartridge cure time. “Touch dry” isn’t cured.
The best silicone job is the one you don’t touch for 24 hours, even if it looks perfect after 20 minutes.
Small habits that prevent the next failure
Seals don’t fail only because they’re old. They fail because moisture and movement keep getting a vote.
- Squeegee the screen and tiles after showering. Less standing water means less time for seepage.
- Ventilate for long enough. Twenty minutes after a shower is more useful than five minutes during it.
- Stop wobble at the source. Tighten shower screen brackets, fix loose taps, and don’t rely on sealant to hold hardware steady.
- Watch the corners. Corner joints and the back edge of the bath are early warning zones-check them monthly in ten seconds.
When to stop DIY and call someone
If water is showing up where it shouldn’t, silicone is unlikely to be the real repair.
Call a plumber or competent bathroom fitter if:
- the shower tray feels springy or moves underfoot
- grout lines are cracking repeatedly near the base
- there’s staining on adjacent walls or ceilings
- the floor feels soft, bouncy, or sounds “hollow” near the shower
- you’ve re-sealed once and it failed again within months
A hidden leak is cheap when it’s caught early and expensive when it’s been gently soaking timber behind a tidy bead.
FAQ:
- Can a seal look fine and still leak? Yes. Silicone can remain visually continuous while losing adhesion behind the bead, letting water track along the joint.
- Is black silicone always a sign of a leak? Not always. It can be surface mould from humidity, but repeated staining in the same spot can indicate moisture feeding from behind.
- Should I seal over old silicone to save time? No. New silicone won’t bond reliably to old residue, and you often trap moisture underneath.
- Do I need to fill the bath with water before sealing? If you’re sealing a bath-to-tile joint, yes. It helps the bath settle under load so the seal isn’t stretched the first time it’s used.
- How long should I wait before using the shower? Follow the cure time on the cartridge; commonly 24 hours. Using it too soon is a common reason seals fail early.


Comments (0)
No comments yet. Be the first to comment!
Leave a Comment